
Can Your Desk Support a Monitor Arm? What to Check Before Buying
A monitor arm needs more than the right desk thickness. Check the tabletop, mounting space and monitor specifications before buying.
Table of contents
Start with the actual tabletop, not the product nameMeasure the attachment pointClamp or grommet: compare the hardware firstUnderstand the load — and the limits of reinforcementBuild a compatibility checklist before checkoutWhat to do if your desk is incompatible
A desk can support a monitor arm only if its tabletop, mounting point and underlying structure are compatible with the specific arm and monitor. Check the desktop material and condition, thickness, space for the clamp or grommet mount, and the monitor’s weight and mounting pattern. A desk’s overall weight rating alone does not establish whether a small area at its edge can safely hold a clamp.
Start with the actual tabletop, not the product name
Two desks with similar finishes can have very different cores. A desktop may be solid wood, a solid-core engineered board, a hollow or honeycomb panel, glass, or a combination of materials. A thin outer skin can look substantial from above while offering little material where a clamp presses.
Find the exact desk model and version, then look for the manufacturer’s specifications and assembly instructions. If you have an IKEA desk, check the individual tabletop and supporting frame rather than assuming all desks from the same brand have the same construction. If the documentation does not say what the core is or whether a monitor arm is permitted, ask the manufacturer before ordering.
Look at the proposed attachment point for swelling, cracks, crushing, delamination or previous damage. A desktop that is already deteriorating needs an assessment of the tabletop itself; a new arm or plate is not automatically a repair. Avoid choosing a damaged corner simply because it has the easiest access to a power outlet.
Measure the attachment point
Most clamp-style arms grip both the top and underside of the desk. Measuring only the visible edge thickness can miss a rail, drawer unit, decorative lip or support bracket underneath. Get a clear view of the actual point where the clamp would sit and compare each measurement with the drawing for the exact arm and mount.
| Check | Where to measure or inspect | Why it matters |
|---|---|---|
| Tabletop thickness | At the intended attachment point, including any lip the clamp must enclose | The clamp must open and close within its specified range. |
| Unobstructed depth underneath | From the edge to the first rail, drawer housing or obstruction | Both clamp and tightening hardware need room. |
| Contact surfaces | Top and underside where the clamp pads would press | Sloped, uneven or unsupported surfaces may prevent a proper grip. |
| Space behind and above | Wall, shelves, trim and the monitor’s travel path | A mount that fits the desk may still collide when adjusted. |
| Existing hole, if used | Diameter, position and free space underneath | Grommet hardware has its own hole and thickness requirements. |
Example: A tabletop measures 1 inch thick at the edge, but a support rail starts 1½ inches in from that edge. Compare both dimensions with the arm’s mounting drawing. Passing the thickness check does not mean the clamp can reach past the rail or that the tabletop material is approved.
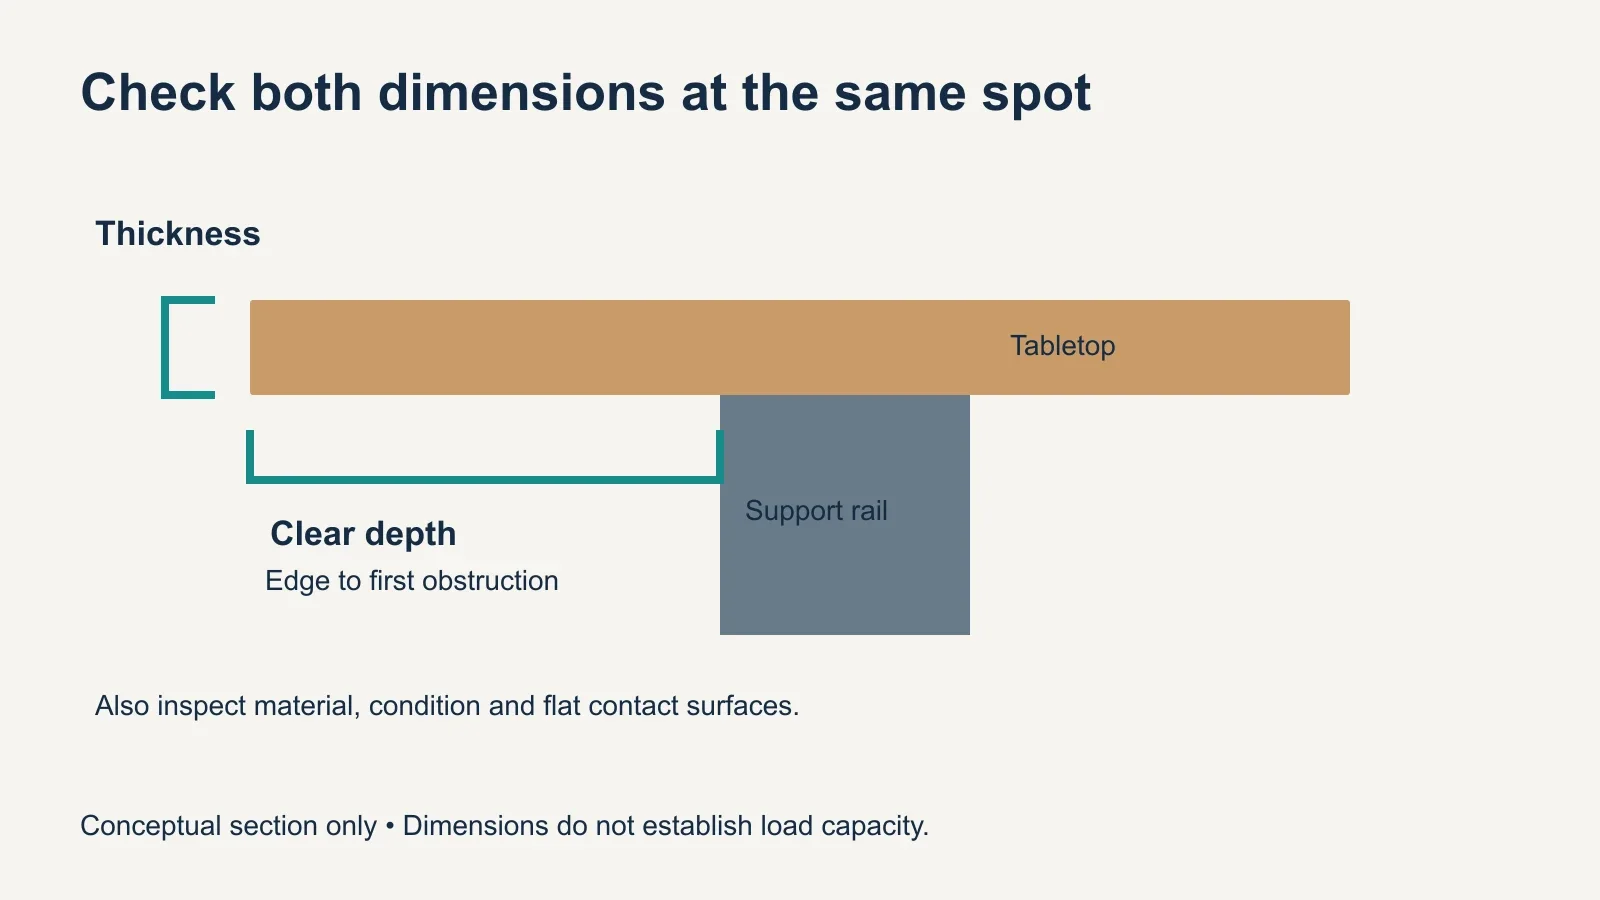
If you cannot see under the desktop, remove loose items and use a light or a mirror. Do not disassemble structural parts simply to make the clamp fit. If the frame blocks the preferred position, check whether another manufacturer-approved location works without creating a new collision or overhang problem.
Clamp or grommet: compare the hardware first
A clamp grips the desk edge. A grommet mount generally uses a hole through the desktop and hardware above and below it. Some arms include both options; others require a separate kit, and not every kit works with every arm.
An existing cable hole is not automatically a mounting hole. Measure its diameter and check its position, the material around it, and the available underside clearance against the mount instructions. A plastic cable insert may need to be treated differently from the structural tabletop. Do not cut a new hole unless the desk manufacturer and mount instructions permit it and you understand what is inside the panel.
Also check the route of the arm itself. Some designs move behind the mounting point when the screen is pushed back; others are designed to stay closer to the wall. Leave room for adjustment and cables throughout the range you intend to use. Do not rely on a photograph of the arm in one position as proof that every position will clear the wall.
Understand the load — and the limits of reinforcement
An arm concentrates force at a small area of the desktop. As the monitor moves away from that point, the leverage on the attachment changes. The monitor’s weight therefore matters, but it is not the whole assessment: the arm’s own design, reach, mounting method and the desktop’s construction all matter too.
Check the monitor weight without its original stand, when the arm manufacturer specifies the supported weight that way. Compare it with both the minimum and maximum rating of the exact arm; a monitor that is too light may also fall outside an arm’s adjustment range. If using two screens, check the rating for each arm and the total requirements. Confirm the VESA mounting pattern, adapter needs and screw lengths using the monitor and arm instructions.
Some manufacturers provide reinforcement plates or specify them for particular surfaces. A plate spreads contact over a larger area, but it does not make every hollow, damaged, glass or thin desktop suitable. Follow both the desk and arm manufacturers’ requirements; if either prohibits the setup, or the surface strength is unknown, choose a different solution or obtain a manufacturer’s assessment.
Build a compatibility checklist before checkout
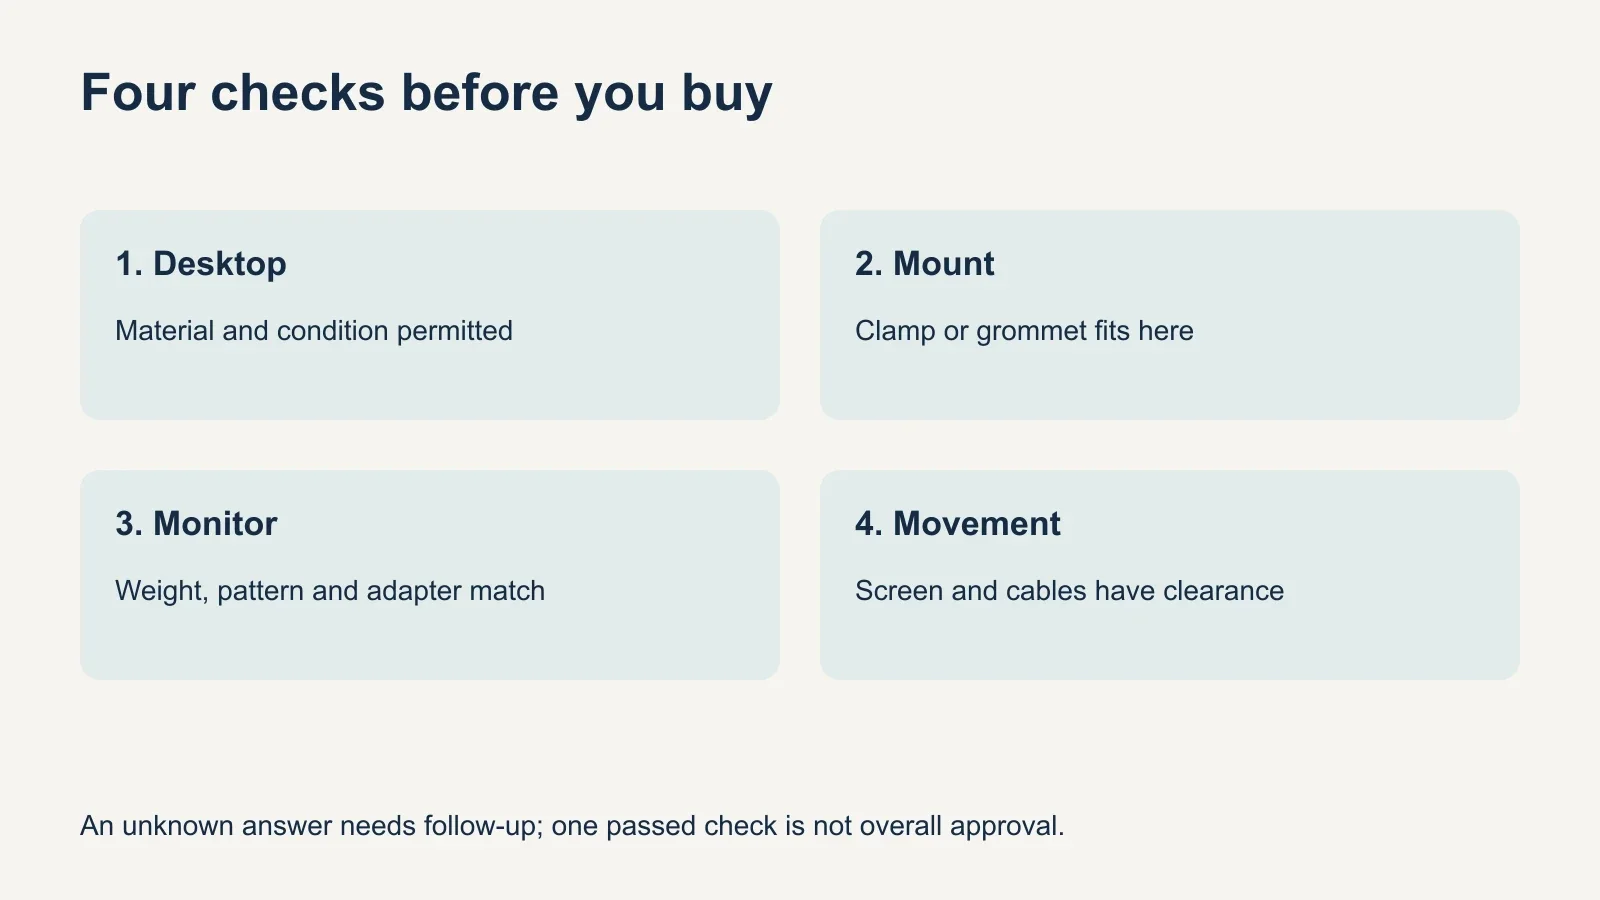
Keep the desk, monitor and arm specifications together in one note. A monitor listing may prominently advertise screen size while putting weight and mounting details elsewhere. A desk listing may describe its finish without identifying the core. Mark missing information as unknown rather than filling the gap with an assumption based on photographs.
- Identify the desktop and supporting frame, including any aftermarket top or modification.
- Record the monitor model, weight without the stand, mounting pattern and any required adapter.
- Save the exact arm model and the instructions for the clamp or grommet hardware you will actually receive.
- Measure the proposed location and photograph the top, rear edge and underside.
- Check the intended screen positions, wall clearance and cable reach.
- Resolve material or load questions with the relevant manufacturer before committing to installation.
A useful question is specific: “This is my tabletop model and material, with these dimensions at this location. Is this arm and monitor combination permitted, and is a particular mounting kit required?” Attach the underside photograph. Asking only whether a product fits a 1-inch desk can produce an answer about clamp opening while leaving the more important material question unresolved.
If your setup uses separate drawer units and a loose tabletop, check how the top is supported and secured as a whole. The IKEA ALEX desk planning guide covers support choices; it does not certify a monitor-arm attachment. A secure-looking clamp can still be part of an unstable desk arrangement.
Account for the workstation you expect to use, not just the screen you own today. A future second display, laptop tray or different adapter may change the supported load and range of motion. Accessories must be allowed by the arm manufacturer; reserving an arbitrary percentage of its weight capacity does not prove that an unlisted accessory will fit.
What to do if your desk is incompatible
If a rail blocks the clamp, an approved alternative mounting position may solve the space problem. If the desk edge is unsuitable but the maker allows a grommet mount, compare a compatible mount with an existing suitable opening. These are different questions from whether the desktop can support the load.
Other options include keeping the monitor on its original stand, using a freestanding monitor stand, replacing the tabletop with one approved for the mount, or considering another manufacturer-approved mounting surface. A wall-mounted solution requires its own assessment of the wall and hardware; it does not follow automatically from the desk being unsuitable.
Before buying, photograph the underside and note the desk model, tabletop thickness, distance to the nearest obstruction, monitor model and weight. Send those details and the intended arm model to the relevant manufacturers when compatibility is unclear. A specific answer for your setup is more useful than a generic claim that an arm fits “most desks.”
After installation, follow the supplied instructions and inspect the contact area as directed. If the surface compresses, cracks, shifts or the clamp loosens, stop using the setup and contact the manufacturer. The goal is a supported monitor that can be adjusted within the permitted range without relying on guesswork about the desk.