Does the Ground Have to Be Level for a Gazebo?
The gazebo needs the level support specified by its manual. A sloping yard or draining patio calls for a planned support solution, not a tilted frame.
Table of contents
Level, flat, plumb and square mean different thingsCheck elevations at every intended post locationUnderstand how a small drainage slope adds upChoose a correction that fits the base and the kitAvoid a universal “close enough” ruleSend the level information before booking assembly
The gazebo needs the level, stable support required by its manufacturer, but that does not necessarily mean flattening the entire yard. A sloping landscape may accommodate a suitably designed foundation. A patio built with a drainage slope may need a coordinated support detail. Resolve the difference in elevations before assembly rather than letting the gazebo frame follow the slope.
Yardistry’s gazebo instructions, for example, call for a square, solid and level starting base. Those words describe different checks. Knowing which condition is missing makes the next conversation with an installer or foundation contractor more useful than simply saying the ground is “a little uneven.”
Level, flat, plumb and square mean different things
| Term | What it describes | Why it matters |
|---|---|---|
| Level | A horizontal reference with no rise or fall. | Checks the elevations required for the support arrangement. |
| Flat | An even plane without local humps or dips. | A surface can be flat while still sloping. |
| Plumb | A vertical orientation. | Checks whether the posts stand upright. |
| Square | The intended right-angle layout of a rectangular frame. | Checks the plan geometry against the kit drawing. |
A smooth patio can be flat and still fall toward the garden. A patch of pavers may look level overall yet contain a low spot under one post. Neither observation alone establishes that the gazebo has the support it needs. Check the mounting locations as well as the overall area.
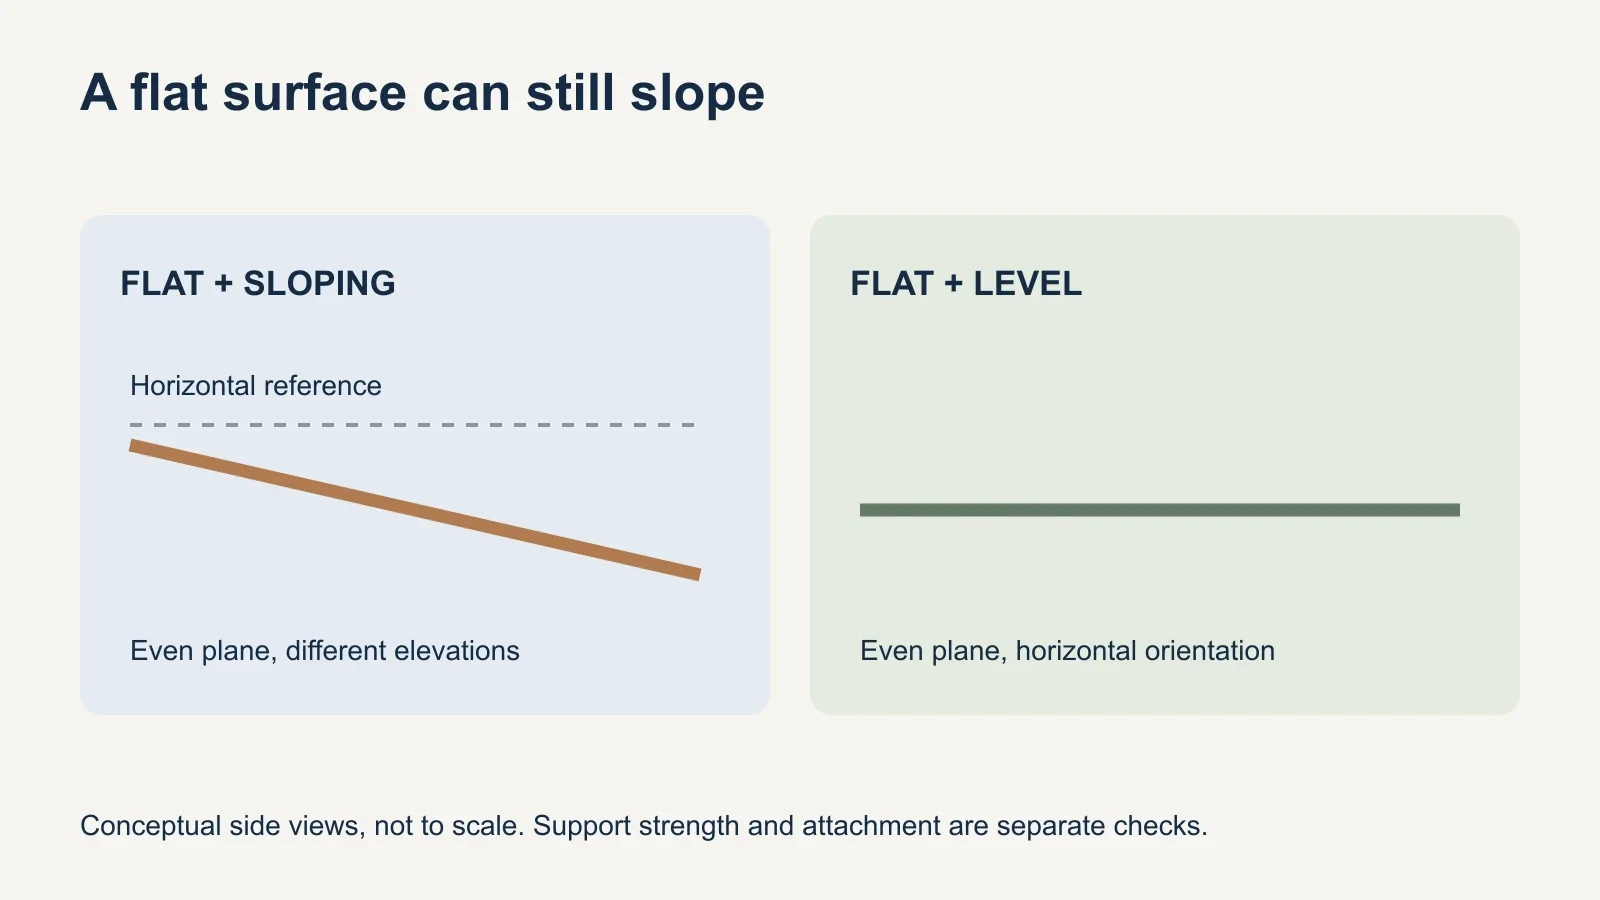
Keep the structural question separate, too. A surface being level does not establish its strength or make it suitable for the specified anchors. Leveling is one part of preparing the base, alongside adequate support, condition and permanent attachment.
Check elevations at every intended post location
Begin with the exact post-layout drawing and the proposed orientation. Label the support locations on a simple sketch so photographs and measurements refer to the same places. For a four-post model, labels A through D are enough; use the number and arrangement that match your actual kit.
Ask the installer or foundation contractor to compare those locations against a common level reference using appropriate measuring equipment. Record the differences in elevation, not just a reading from one short section of patio. This makes it possible to distinguish a consistent slope from individual high or low spots.
- Show the exact post positions and gazebo orientation on the sketch.
- Record elevation differences against one agreed reference.
- Identify local dips, humps, loose units or damaged support areas.
- Check the proposed layout against the manufacturer’s drawing.
- Share the results before deciding on a correction.
Phone photographs are useful for explaining the location, but perspective can hide a slope. If you have measured the site yourself, state how the readings were taken and let the responsible installer verify them. A clear observation is more useful than an unsupported assurance that the patio is “close enough.”
Understand how a small drainage slope adds up
A slight grade can create a noticeable difference over the distance between posts. As a hypothetical example, a 1% fall over 12 feet corresponds to 1.44 inches: 12 feet is 144 inches, and 144 multiplied by 0.01 is 1.44. This illustrates the geometry only; it is not a recommended patio slope or an allowable gazebo tolerance.
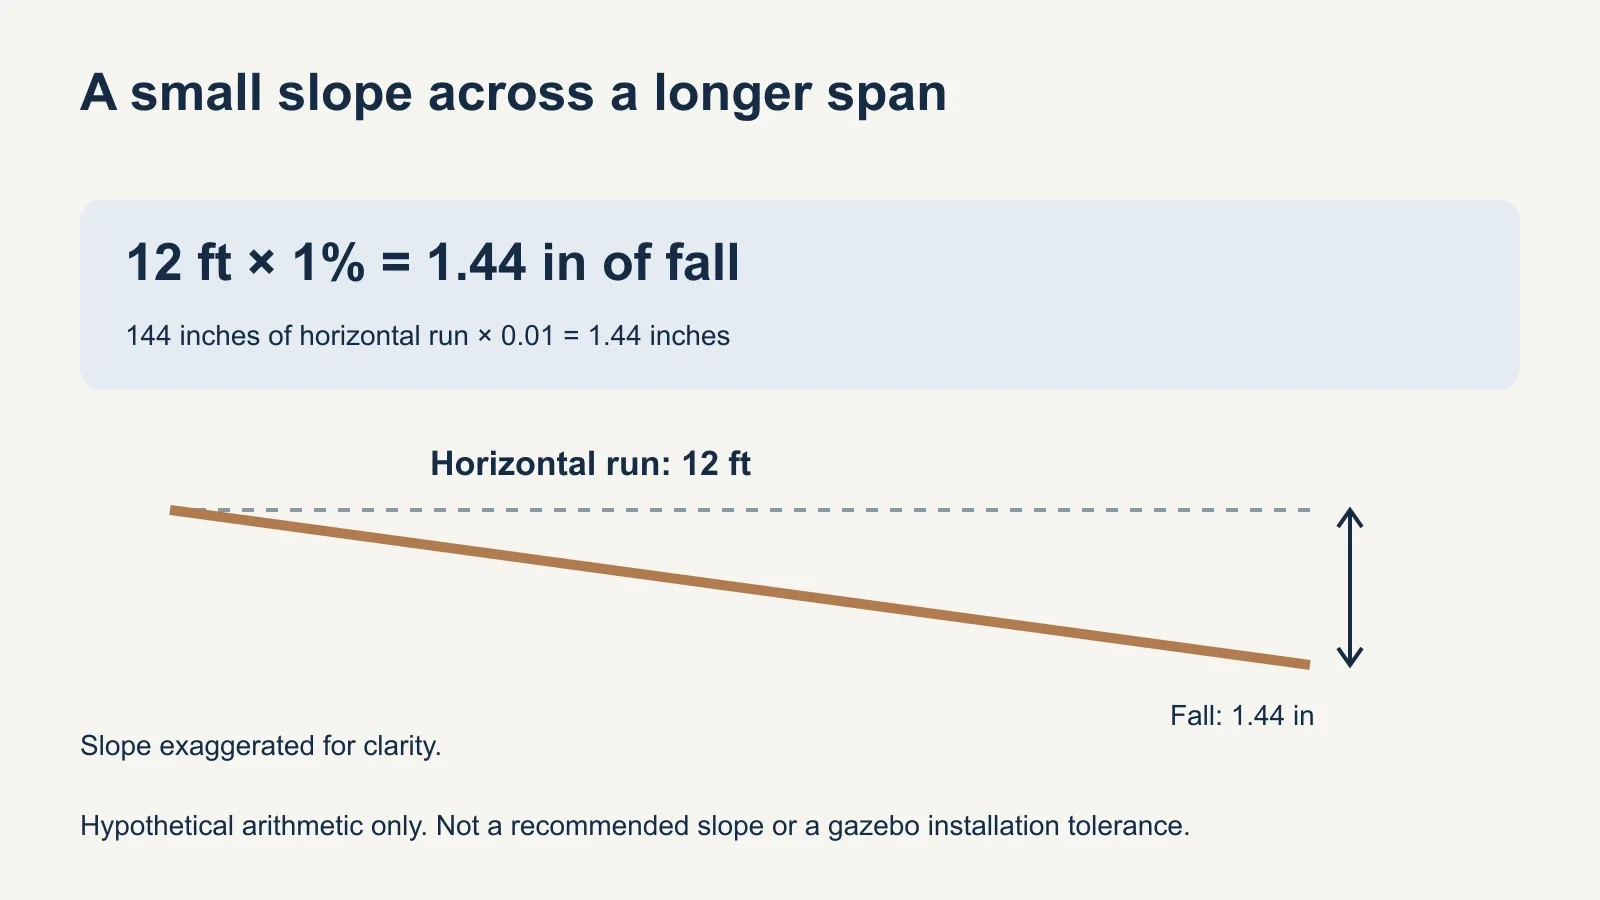
Pavement drainage and gazebo support need to be planned together. The Concrete Masonry & Hardscapes Association’s guidance for pedestrian paving slabs discusses both surface tolerances and drainage slopes. That is pavement guidance, not permission to tilt a gazebo by the same amount. Preserve the drainage function while resolving the kit’s support requirements.
Choose a correction that fits the base and the kit
The right response depends on what the measurements show. A displaced paving unit may point to a pavement repair. A consistent site slope may call for a designed foundation arrangement, a revised layout or another location. Have the relevant professional assess the cause before choosing a cosmetic correction at the surface.
Where separate foundations are suitable, their design can establish the required support elevations while the surrounding landscape retains its slope. That does not automatically make the space between the posts a usable seating area. Consider access, steps, drainage and the finished floor as part of the same project.
Do not assume loose scraps, stacked patio blocks, extra washers or cut-down kit posts are an acceptable leveling method. Any permitted adjustment or bearing detail must work with the gazebo and its attachment. Ask the manufacturer or project designer to resolve a missing detail rather than inventing it during assembly.
Similarly, permanent anchors should not be used to pull a poorly supported or misaligned frame into place. The broader gazebo anchoring guide explains the connection’s role. Confirm the support condition and attachment detail together before either becomes difficult to change.
Avoid a universal “close enough” rule
There is no single leveling tolerance this article can approve for every gazebo, bracket and foundation. Follow any tolerance stated in the correct manual or project documents. If the instructions require a level base but do not give an allowable deviation, ask the manufacturer or responsible professional how that requirement will be checked.
Do not borrow a number from a paving specification, a different gazebo model or an online discussion. Those figures may apply to a different span, surface or purpose. Keep the reference and the measurement method with the project information so everyone understands what is being accepted.
Recheck the prepared site after corrective work. If the layout changes, verify the new post locations rather than relying on measurements from the old footprint. The handoff to the assembly crew should identify the finished support arrangement and any conditions that still need resolving.
Send the level information before booking assembly
A useful booking packet includes the manual, site photos, a labeled post sketch and the measured elevation differences. Add any agreed correction details and the expected completion date for preparation. This helps distinguish a ready base from a site that still requires a separate visit or contractor.
For gazebo assembly with UPTask, share that packet when discussing the job. Confirm that leveling or foundation work and permanent attachment are addressed in the agreed scope before setting the assembly appointment.