IKEA BILLY Built-Ins: How to Plan a Wall-to-Wall Bookcase
A built-in look starts with the right combination of bookcases, usable wall measurements and a separate plan for anchoring and trim. Work through the layout before buying.
Table of contents
Measure the wall at the points that matterChoose widths and calculate the remaining spaceCheck height, extensions and access above the casesResolve baseboards, floor support and wall attachmentPlan doors, shelves and finishes as part of the layoutSeparate the shopping list from the work scope
To plan IKEA BILLY built-ins, measure the usable wall, choose a combination of bookcase widths, and reserve space for installation, door movement and finishing trim. The bookcases still need the wall attachment specified by IKEA. Fillers and molding can create a fitted appearance, but they do not replace proper support or anchoring. Treat furniture assembly and custom carpentry as separate parts of the project, with the complete layout agreed before either begins.
Measure the wall at the points that matter
Measure the width near the floor, midway up the wall and near the planned top of the bookcases. Check the ceiling height at both ends and between them. Record the smallest relevant opening rather than relying on one convenient measurement. Walls and floors that look straight can leave a noticeable taper when a long row of rectangular cases is placed against them.
Mark baseboards, door casing, window trim, switches, outlets, heating equipment and vents on a simple sketch. Include anything that needs to remain accessible. A wall-to-wall bookcase should not hide a required control or obstruct a heating or ventilation path. If an outlet or other service needs relocation, resolve that with the appropriate professional before closing in the area.
Measure the room’s working space too. A bookcase may fit in its final position while leaving little room to assemble it, lift it safely or install the wall attachment. The furniture assembly space guide helps you plan the clear area around the job. Keep the delivery route and the floor protection plan separate from the finished-wall dimensions.
Choose widths and calculate the remaining space
Two current US tall white BILLY options are 31 1/2 inches wide and 15 3/4 inches wide. Both listed frames are 11 inches deep and 79 1/2 inches high. Use the exact product measurements for the pieces you intend to buy; a package dimension or an older online makeover is not a substitute for the current frame size.
Start with this calculation: usable wall width minus the combined bookcase widths equals the space still to allocate. That remainder may need to cover side fillers, deliberate spacing and installation tolerance. It is not automatically spare storage width. If you plan spacers between cases, their total width must be subtracted before calculating the side fillers.
| Bookcase combination | Frame width total | Space still to allocate |
|---|---|---|
| Three 31 1/2-inch cases | 94 1/2 inches | 25 1/2 inches |
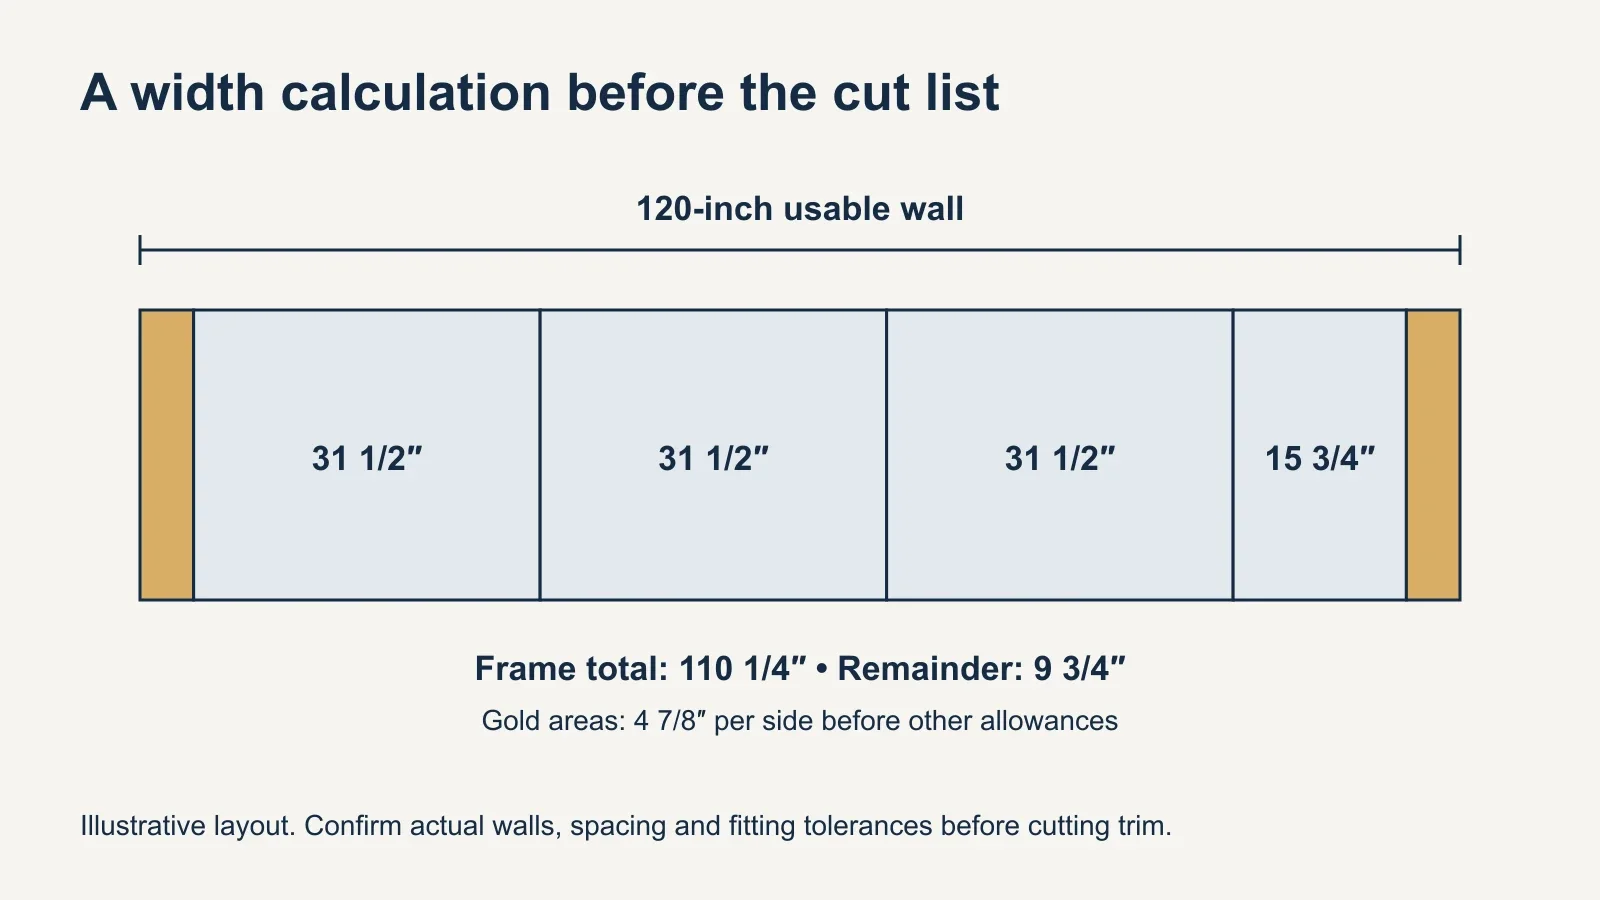
| Three 31 1/2-inch + one 15 3/4-inch | 110 1/4 inches | 9 3/4 inches |
| Four 31 1/2-inch cases | 126 inches | Does not fit: 6 inches too wide |
In the second example, a perfectly symmetrical arrangement would leave 4 7/8 inches at each end before allowing for any other gaps or tolerances. That is an initial layout calculation, not a cut list. The carpenter should set final filler sizes from the actual installed positions and wall shape. A narrow case can also be placed centrally or at an end to change the visual balance.
Sketch the shelf divisions, not just the outside rectangle. Three wide cases give a different rhythm from a mix of wide and narrow cases, even if both fit. Decide where large books, display pieces and any doors will go. The best combination makes useful storage and a balanced elevation without forcing a cabinet into an opening that is too tight.
Check height, extensions and access above the cases
A current 79 1/2-inch BILLY with the matching 13 3/4-inch height extension reaches 93 1/4 inches overall. The 31 1/2-inch extension is specified for the corresponding 31 1/2-by-79 1/2-inch bookcase. Do not assume an extension fits a shorter case or another generation just because the outside width seems similar.
On a nominal 96-inch ceiling, that combination leaves 2 3/4 inches before accounting for floor variation or a proposed platform. IKEA says to leave enough room above the furniture to anchor it to the wall. The arithmetic alone therefore does not prove the combination is installable. Check the actual anchoring procedure and working access before deciding how to finish the top.
A top fascia is a flat finishing board across the remaining gap; crown molding is another decorative option. Either should be planned after the bookcase height and required attachment access are understood. Make sure the finished design also permits necessary future inspection or removal. Do not seal in an unresolved fixing simply to make the front look complete.
Resolve baseboards, floor support and wall attachment
Baseboards can hold a case away from the wall, and an uneven floor can change the alignment across a long run. Record the trim’s height and projection and check the actual bookcase profile. Discuss whether existing trim remains, is altered or is incorporated into a custom base detail. Avoid cutting the furniture to clear an obstacle without a suitable plan.
A raised platform is a custom construction decision. It changes the overall height, support arrangement and position of the wall attachment. Have it designed for the furniture and intended contents; do not assume a decorative plinth or a few loose blocks will provide suitable support. If a platform is unnecessary, leaving the supplied furniture configuration intact can simplify the project.
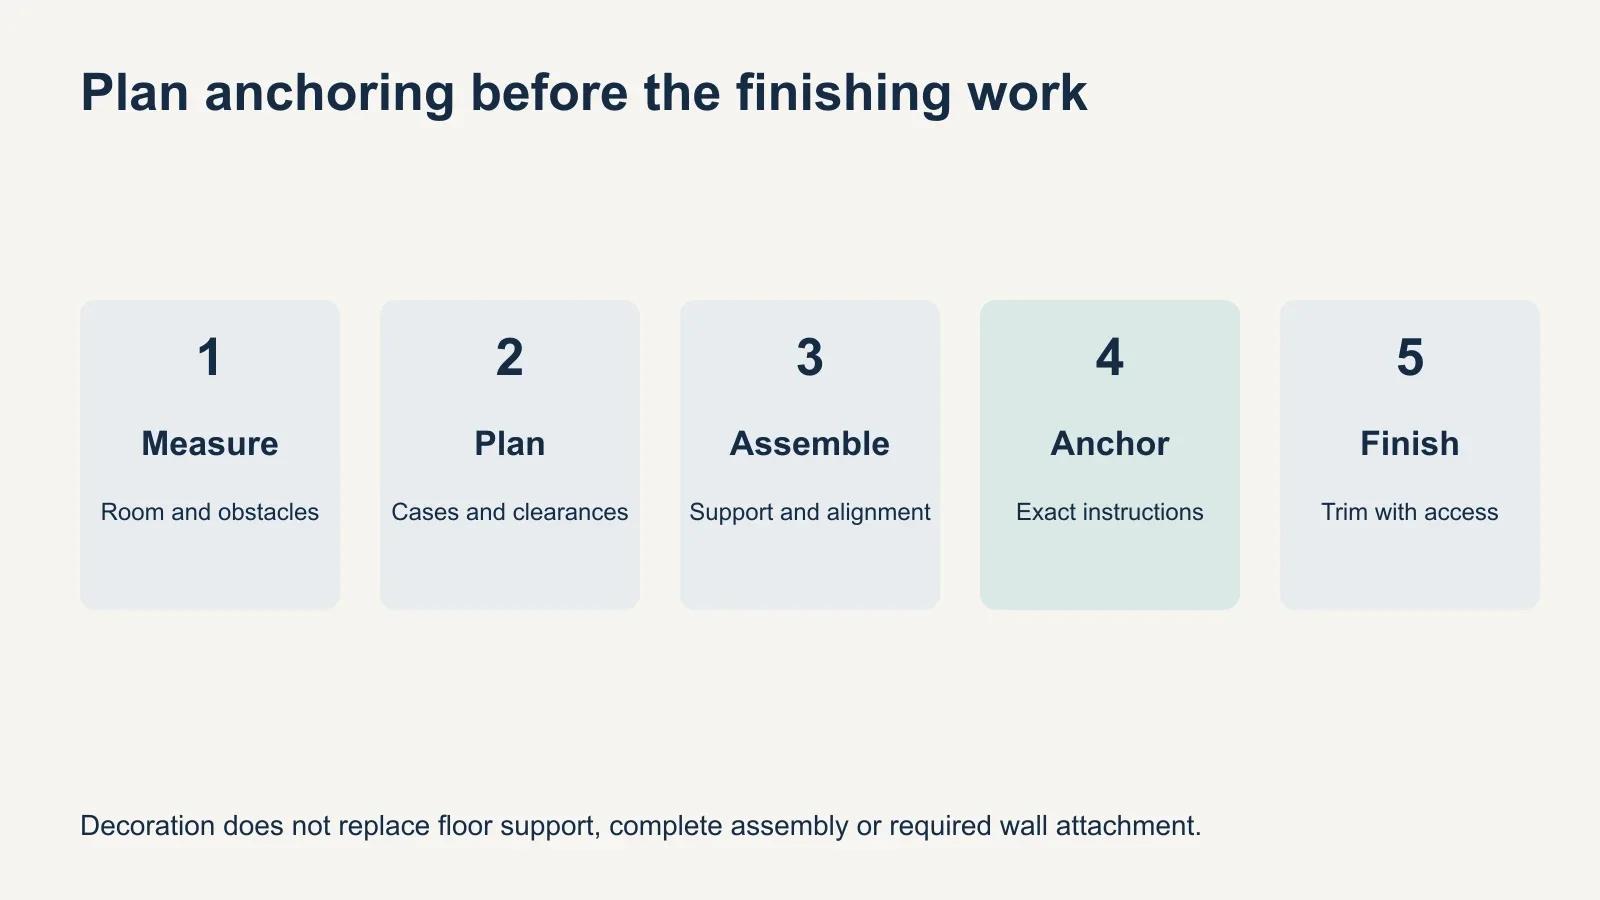
Follow the exact BILLY assembly instructions, including the back and fixed components. Do not omit parts to reach a socket or to make the cases easier to fit. The current US tall bookcases require secure anchoring with suitable wall screws and plugs. Read the wall-anchoring guide when planning this part of the work, and get help if the wall construction is uncertain.
Connecting adjacent cases or adding a face trim does not replace the required wall attachment. Decorative strips should not be treated as a structural connection. Confirm how each unit and any extension will be secured before the finishing details are installed. This is especially important where the fitted appearance would hide the original mounting area.
Plan doors, shelves and finishes as part of the layout
Adding doors affects more than appearance. Allow room for the door to open beside a return wall, and check that a knob or handle will not hit nearby trim. Use the specified hinge locations and test the full opening after positioning the case. Do not choose a narrow side filler solely from the front view if it leaves the door unusable.
For the current OXBERG full-height panel door, IKEA lists one door for a 15 3/4-inch BILLY and two for a 31 1/2-inch case. The listing also excludes bookcases bought in spring 2014 or earlier. That makes the purchase date and product generation relevant when upgrading an existing library. Confirm compatibility for the exact door and bookcase, including any corner arrangement.
Choose shelf positions around the actual contents and retain the required fixed shelf. The current wide white frame lists a maximum of 66 pounds per shelf, while the narrow white version lists 31 pounds. Follow the limit for each exact shelf and distribute contents appropriately. Adding trim or fastening cases side by side does not increase the manufacturer’s shelf rating.
If you plan to paint, identify the surface and select a compatible preparation and coating system using the coating manufacturer’s instructions. Current BILLY components include paper-foil surfaces; they should not be treated as unfinished solid wood. Test the proposed finish on a discreet area or sample before committing the full installation. Keep coatings out of hardware and moving parts.
Separate the shopping list from the work scope
- Confirm the wall survey, smallest usable dimensions and access to services.
- Choose exact bookcase, extension, shelf and door article numbers.
- Calculate the frame widths and reserve the remaining space deliberately.
- Agree on floor support, wall attachment and the assembly sequence.
- Design fillers, fascia and any finish around the installed furniture and access needs.
- Confirm which person supplies materials and performs each part of the work.
Ask for a scope that distinguishes flat-pack assembly, positioning and anchoring from custom platforms, scribed fillers, trim and painting. Include any separately arranged electrical or wall work. A low furniture price does not describe the cost of a complete fitted installation, and an assembly quote should not be assumed to include carpentry that has never been specified.
When arranging furniture assembly with UPTask, share the complete product list and room sketch, and confirm the work included. If you want a built-in finish, identify the custom work separately before booking. The next useful step is a dimensioned layout with a clear anchoring and finishing sequence, rather than buying enough cases to approximately fill the wall.