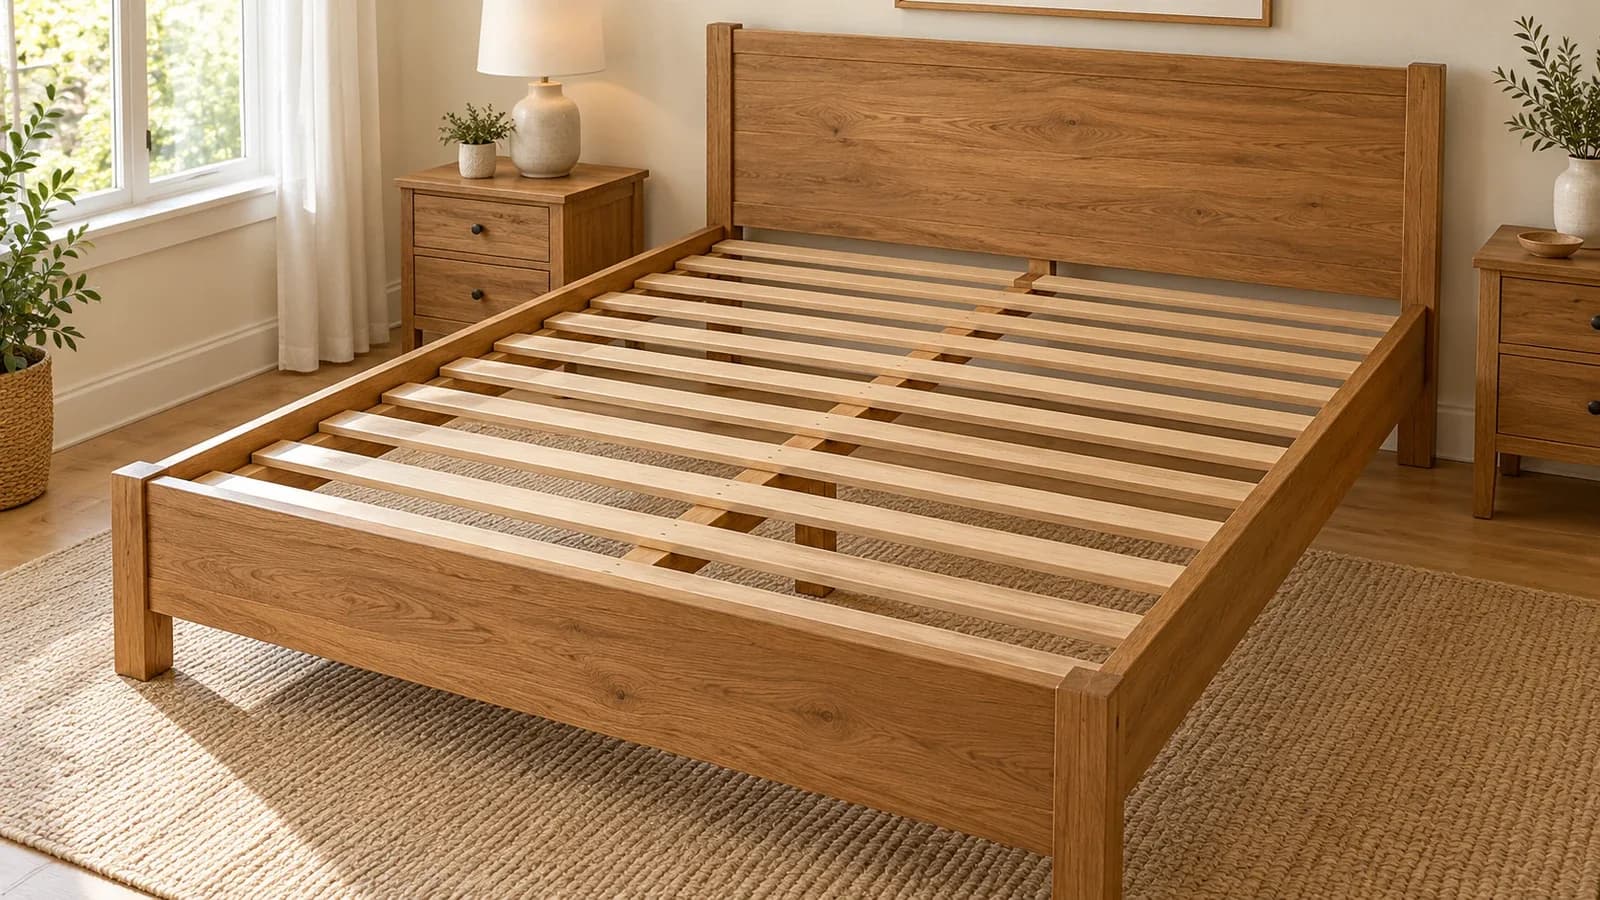
IKEA MALM Bed Squeaking? What to Check Before Replacing It
Trace the sound to the floor, mattress, frame joints or slatted base before replacing parts. Learn which checks are reasonable and when damage calls for professional help.
Table of contents
Identify your MALM version and the soundRule out contact around the bedInspect the frame joints without over-tighteningCheck the center support and the slatted baseRetest carefully and decide what needs replacingPrepare a useful brief for assembly or repair help
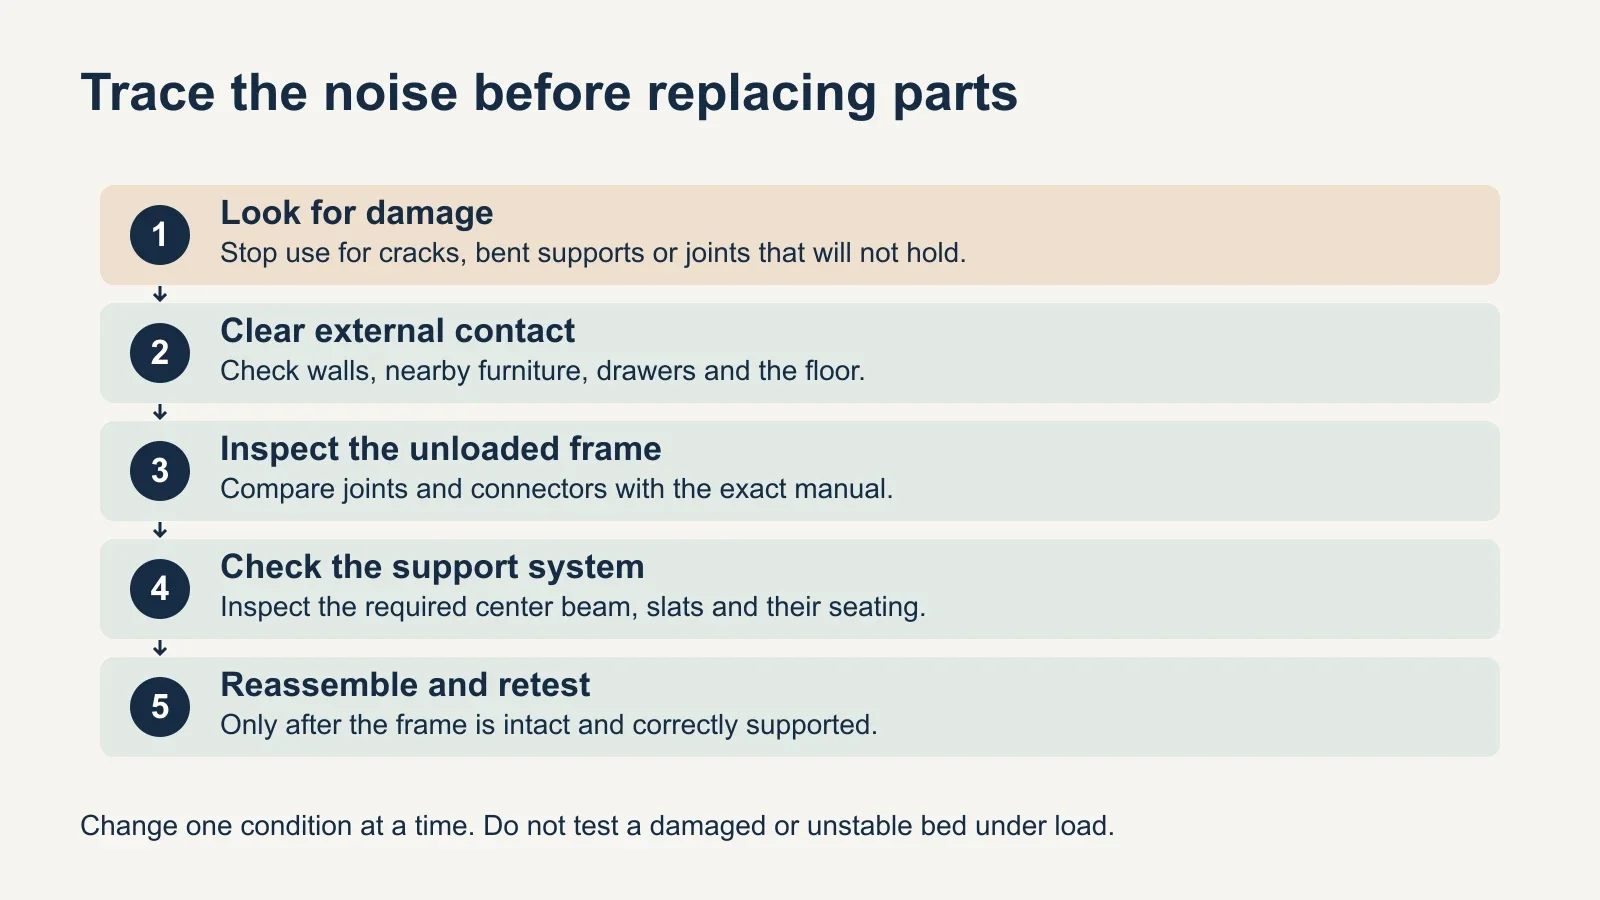
Before replacing a squeaky MALM bed, identify which part is making the sound. Check contact with the wall or nearby furniture, then inspect the unloaded frame, its connectors, required center support and slats. IKEA advises re-tightening the bed’s screws and connectors when needed for stability. Stop using a bed with cracked structural parts, a displaced support or joints that will not hold; reducing the noise is not enough to make a damaged frame sound.
Identify your MALM version and the sound
This guide concerns a conventional MALM bed frame with a separate slatted base. MALM has been sold in different sizes, revisions and storage configurations, so use the article number and instructions for your own frame. A lift-up storage bed has a different mechanism and needs its own service procedure. Do not work under a raised mattress platform or treat this guide as instructions for adjusting a lifting mechanism.
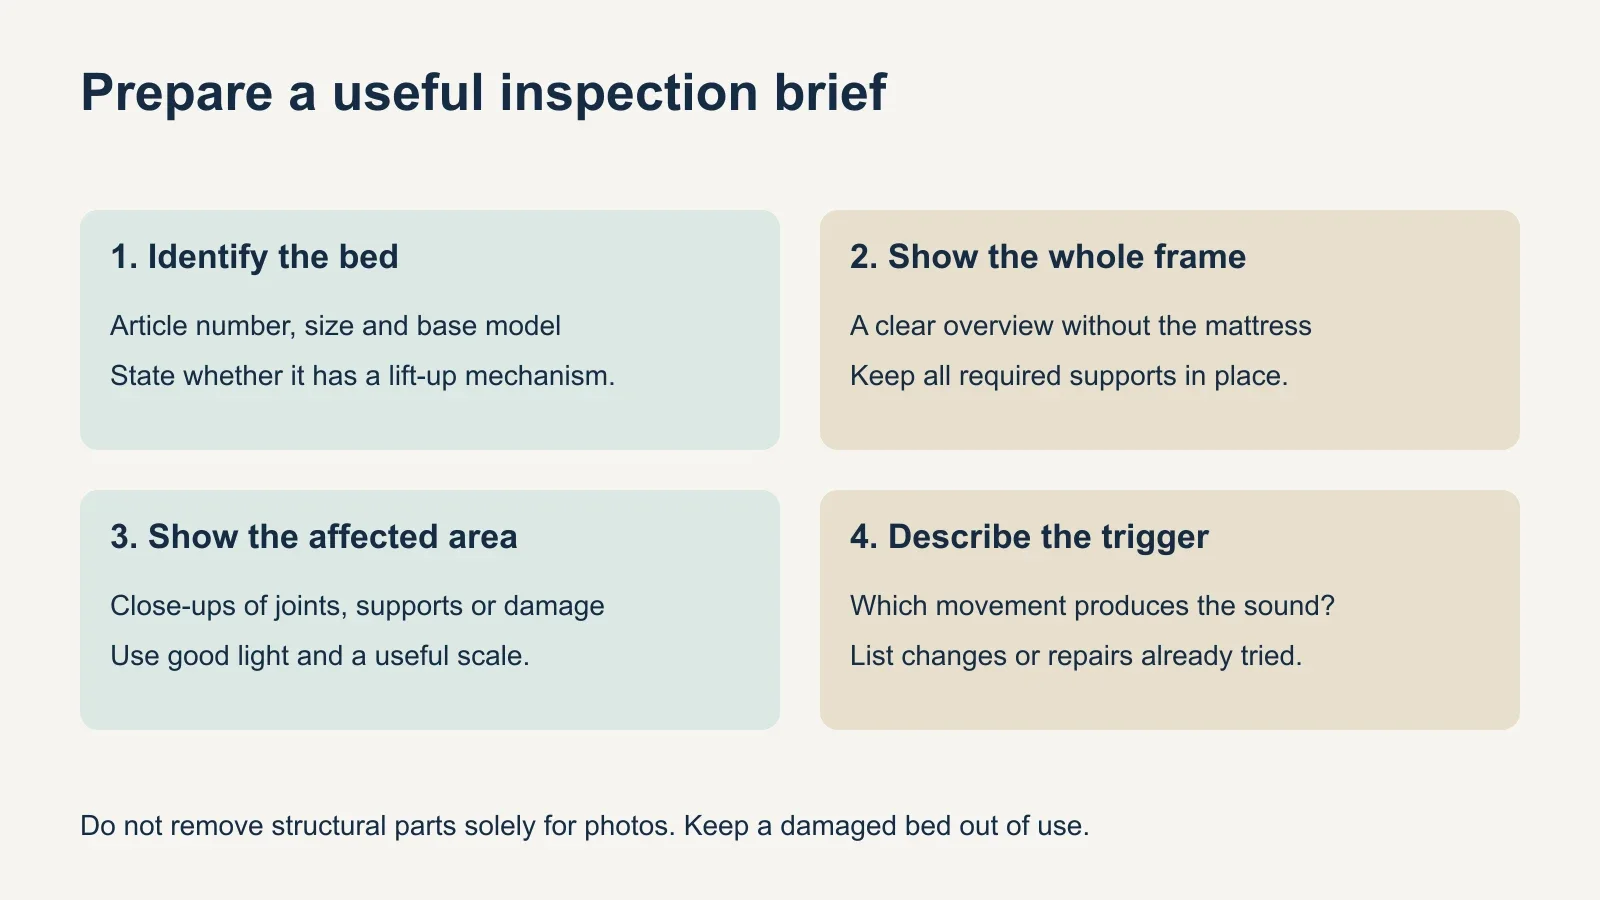
Note when the noise occurs: getting in, turning over, sitting near a corner or moving the bed. Also note whether it began after assembly, a move or a mattress change. These details narrow the inspection; they do not prove that a particular component is faulty. A short recording and a description of the movement can be more useful to an assembler than saying that the whole bed squeaks.
Look for visible damage before trying to reproduce the noise. If the frame appears intact and stable, use only ordinary gentle movement to locate the sound. Do not jump on it, stand on exposed slats or repeatedly load a joint that is opening. Remove bedding and move the mattress with appropriate help before inspecting or adjusting the support underneath.
Rule out contact around the bed
Check whether the headboard, frame or bedding is touching the wall, baseboard, nightstand or another object. Also check under-bed drawers and stored items. An object rubbing against a sound frame can create a noise that seems to come from a joint. Clear the contact and test again before taking the bed apart.
Inspect the floor around the supports for debris, a folded rug or an uneven transition between surfaces. If the floor itself makes the sound when someone walks beside the bed, a new slatted base may not address it. A rocking frame needs a proper assessment of its contact with the floor; avoid stacking loose scraps under it as a permanent fix.
If repositioning is necessary, unload the bed and move it with help following its handling instructions. Dragging a loaded frame to test a theory can put extra stress on its joints. Change one condition at a time and record whether the sound changes. Otherwise, you may quiet the bed temporarily without learning which adjustment mattered.
| What you observe | Area to inspect | Useful next step |
|---|---|---|
| Noise near a wall or nightstand | External contact | Clear the contact and retest |
| Sound when walking beside the bed | Floor or objects near the supports | Check the room before buying bed parts |
| Movement at a corner joint | Frame connectors and surrounding material | Inspect unloaded; compare with the manual |
| Sound near the middle of the bed | Center support and slat seating | Check required parts and their engagement |
| Sound remains only with the mattress in place | Mattress and loaded support system | Investigate both; do not assume the mattress is at fault |
| Cracks, bent supports or a joint that will not hold | Structural damage | Stop use and seek a repair or replacement assessment |
Inspect the frame joints without over-tightening
With the mattress removed and the frame unloaded, compare the assembled bed with its instructions. Check the connections between the side rails, headboard and footboard, along with the support fittings shown for your version. Look for gaps, missing hardware, displaced brackets or movement where parts should meet securely.
IKEA’s care guidance for the US Queen MALM frame, article 902.494.83, calls for re-tightening screws and other connectors when necessary. Use the correct tool and follow the assembly instructions. The aim is to restore the intended connection, not apply as much force as possible. Do not use an impact driver to chase a noise or keep turning a fastener once the surrounding material starts to crush.
A screw that turns without tightening, a split around a connector or an enlarged mounting hole is a different problem from a loose but undamaged joint. Stop and identify the damaged part. Oversized screws, glue in a connector or improvised brackets can change how the connection works and make later service harder. Ask about the correct replacement part or an appropriate repair instead.
Check the center support and the slatted base
The conventional US Queen MALM frame requires a SKORVA center support beam. It is a separate component, even when included in the price of a bed combination. Confirm the requirements for your exact size and version, then check that the specified support is present and correctly engaged at its attachments. A missing or displaced support is not a minor noise issue.
Inspect the side supports and any braces or retaining parts shown in the correct manual. Do not remove a metal brace because it appears to be where the sound originates. First establish whether the part is correctly positioned and secured. Structural parts should not be deleted from the assembly to make it quieter.
Check the slats for cracks, splits, distortion and ends that are no longer seated on the intended supports. For ribbon-connected slats, look for twisted or displaced sections. For a framed base such as LÖNSET, inspect the base frame and slat holders as well. Compare orientation and retention with the instructions rather than assuming the mattress will hold everything in place.
Do not pack thick felt, foam or folded cloth under load-bearing slat ends to hide movement. Added material can change the seating and support geometry. Likewise, do not screw slats down, coat all fittings with oil or add a sheet of plywood as a universal fix. Use a product-specific remedy only when the manufacturer confirms the location, material and method are suitable.
Replacing LURÖY with LÖNSET is not a guaranteed cure for squeaking. A loose frame joint, unsupported rail or contact with the floor remains a separate issue. Identify and correct the underlying assembly or damage problem before deciding whether a different base is needed. A replacement should match the frame and the mattress requirements, not just the nominal bed size.
Retest carefully and decide what needs replacing
After an allowed adjustment, confirm that the whole support system is back in its instructed configuration before reinstalling the mattress. Retest with ordinary use only if the frame and supports appear intact and secure. Keep the conditions consistent so you can tell whether the particular adjustment changed the sound.
If the noise occurs only after the mattress is returned, the result still does not isolate a single cause: the frame is also now under a different load. Check for mattress contact with surrounding furniture and consult the mattress manufacturer about noise from the mattress itself. Do not leave the mattress on the floor as a permanent workaround without checking its ventilation and support requirements.
A damaged slat, holder or connector may call for a matching component rather than an entirely new bed. A badly damaged panel or a joint that cannot hold securely may require more extensive replacement. Ask IKEA or a qualified furniture professional to assess the specific damage; do not continue repeated tightening on deteriorated material.
Use the part number in the exact assembly manual when available, and keep the article number and photos together. Replacement routes and stock can change. Ask IKEA about current availability rather than assuming every component can be ordered online or that a visually similar screw will work.
Prepare a useful brief for assembly or repair help
- Record the bed size, article number, slatted-base model and whether it has a lift-up mechanism.
- Describe the movement that produces the sound and when the problem started.
- Photograph the complete frame and the affected area with the mattress safely removed.
- Include close-ups of connectors, support attachments and any visible damage.
- List adjustments already made and any missing or replaced parts.
- Keep the bed out of use if the structure is damaged or cannot be secured.
Clear the room before the visit using the furniture assembly space checklist. If the bed needs reassembly after a move, the bed frame assembly timing guide helps with planning. For an UPTask furniture assembly request, describe the existing bed and the noise so the scope can be clarified before work begins. Choose replacement parts only after the problem has been identified.